With its easy-to-use drag and drop functionality, WordSeed Smart Stores allow you to create, customise and launch your own store in under 10 minutes. All without worrying about coding, brand partnerships, inventory management, customer service and shipping.
Smart Stores are available to all WordSeed publishers and content creators, so sign up today to get started.
Get Started
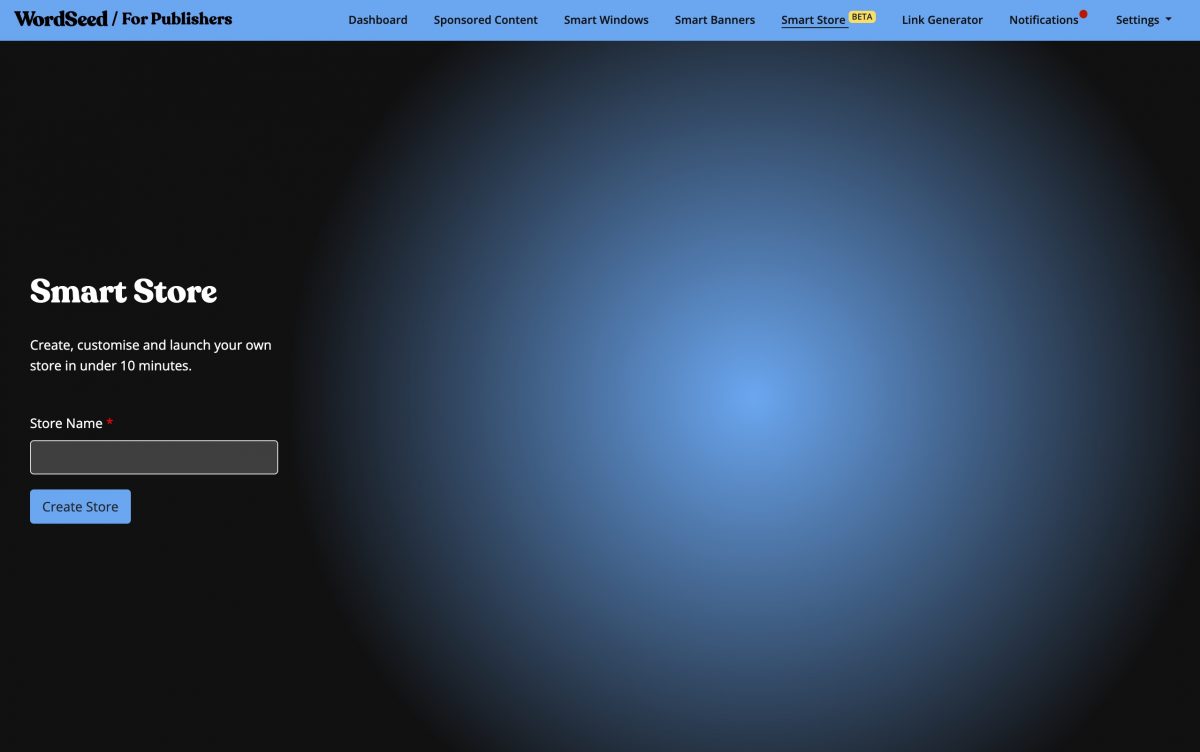
To get started, head over to the Smart Store page in your publisher dashboard. You’ll be asked for your Store Name. This will be the name that will appear at the header of your Smart Store. You’ll be able to change it at any time. Simply provide a name, and click Create Store.
A quick overview
Congratulations, your Store is now created and live! We encourage you to customise some parts of your store, but lets talk about what is where first:
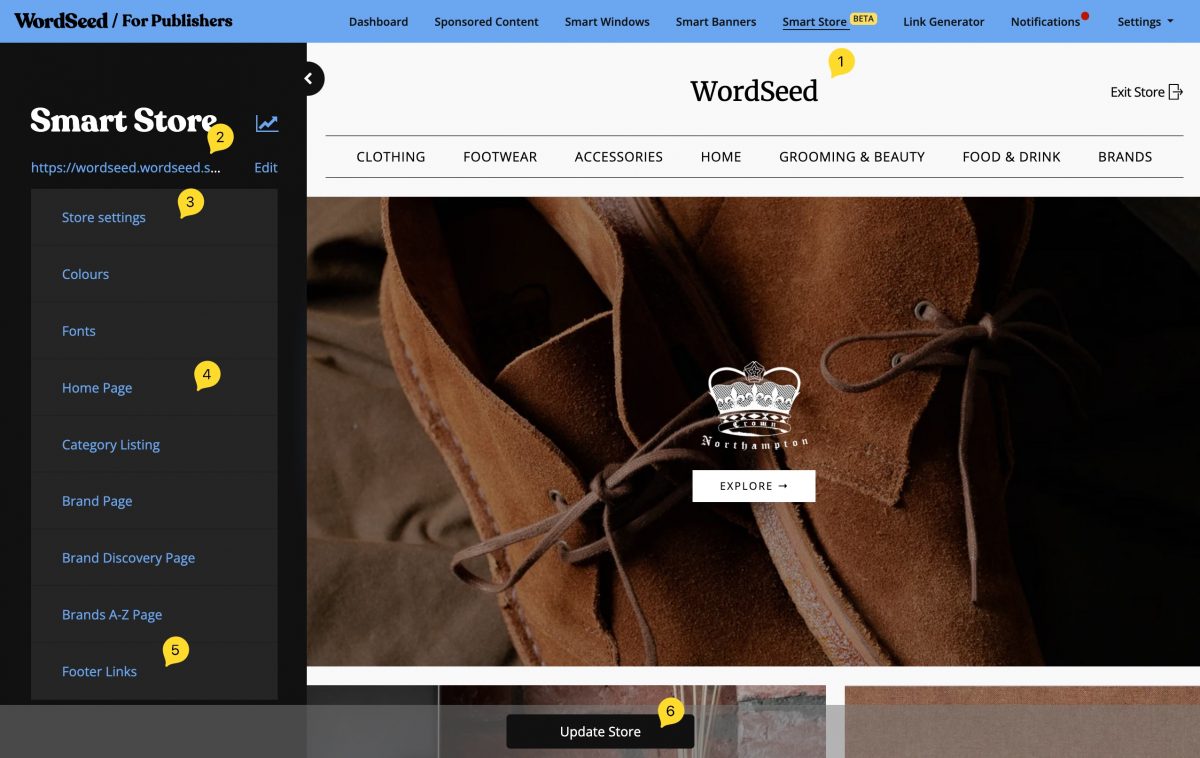
- To the right is your store preview. The Store Name that you entered previously is at the top
- To the left you’ll see your default URL. You can edit it here too.
- Under Store settings you can edit basic info about your store, such as its name, or any brands or categories you may wish to exclude.
- Underneath you can change the content of your Home Page as well as other types of pages.
- Under Footer Links you can change the links that you can see in the footer of your store.
- The Update Store button saves any changes you make, and updates the preview.
First customisation
Expand the Store Settings section and supply the following:
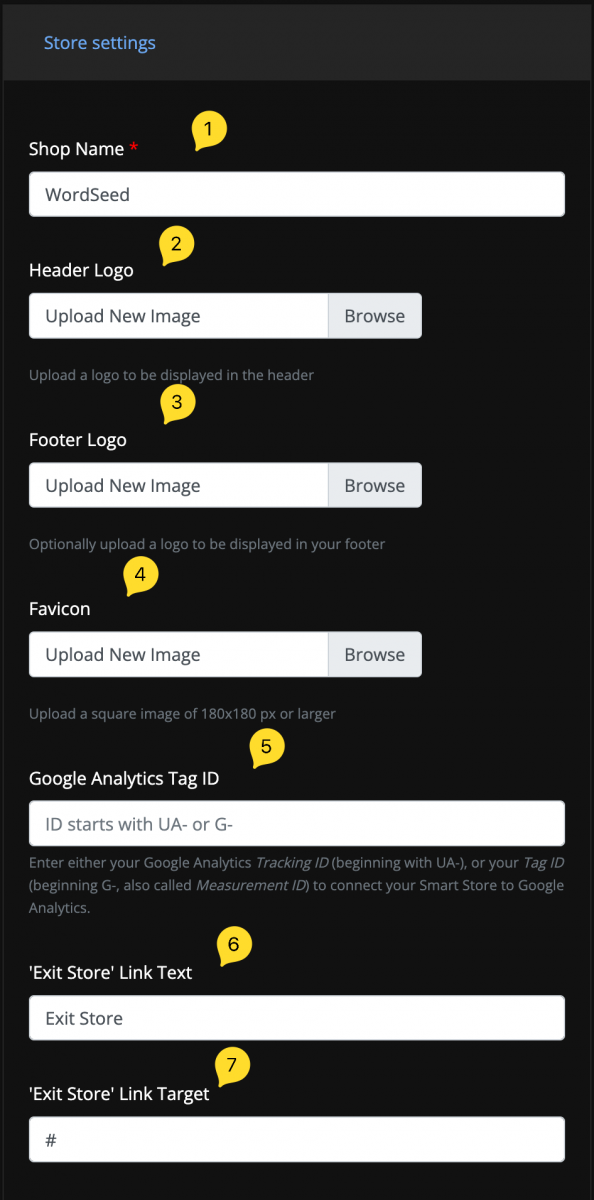
- This is where you can update your Store Name if you wish
- Upload a logo for your store. This will be shown at the top of your store, instead of the store name. It should be dark, with transparent background.
- If you wish, you can also upload a separate logo to appear in the bottom left of your footer. As the footer has a black background, you should upload a logo that’s light with a transparent background.
- Upload a favicon. This should be a square icon, and will be displayed in your browser’s tab bar, when visiting your store.
- If you use Google Analytics you should insert the Google Analytics ID here. We accept both the older Universal Analytics (UA), or the newer Google Analytics 4.
Insert only the ID, not the full tracking code. - At the top right of your store is an Exit Store link. This is designed to take visitor back to your main website. You can change the text for that link here.
- Enter the URL of your main website here. Make sure you include the
https://prefix.
Customising the footer
The footer of your page is designed to contain links to Privacy and Cookie policies, as well as a contact page. Expand the Footer Links section, and adjust and/or remove any links as desired.
Connection your own domain
When you first create your Smart Store it will be available with a .wordseed.shop domain. You will probably connect your own domain, such as store.yourdomain.com.
To do that, head over to our Domain Management page. Click the Add Domain button and follow the instructions on screen.
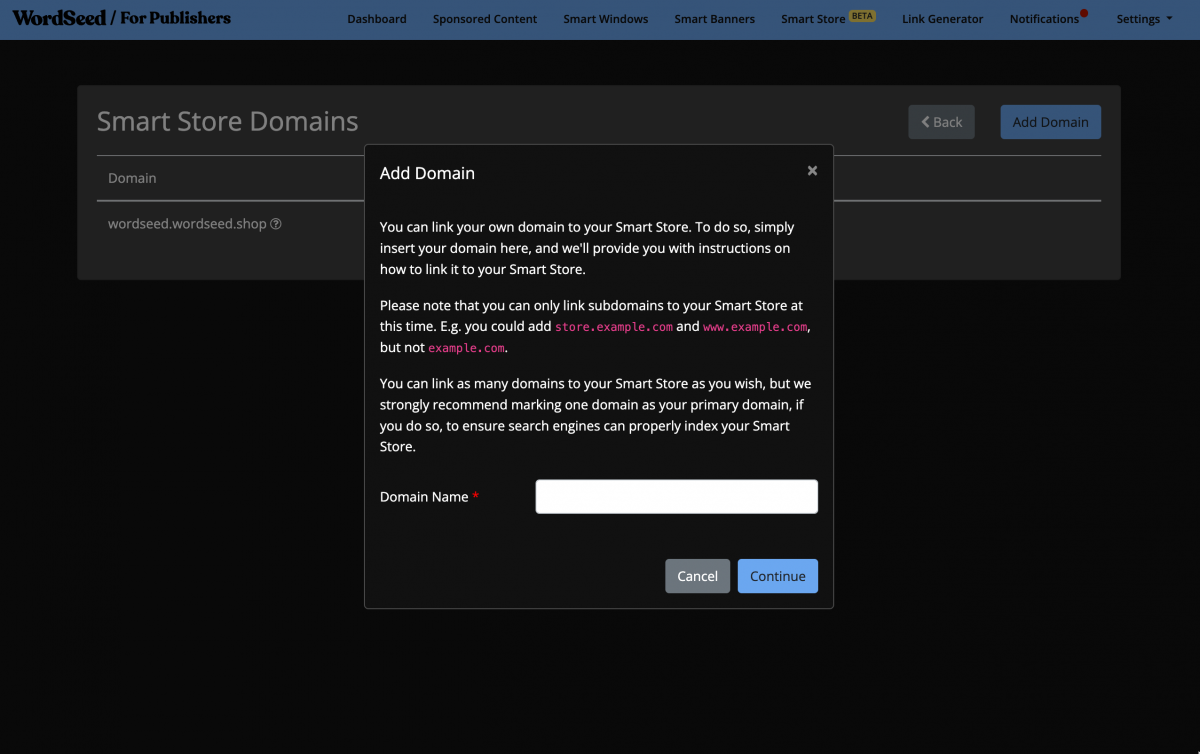
It is very important to configure the primary domain, after linking your custom domain name. This is because search engines don’t like it if the same content is available at multiple URLs (e.g., at https://example.wordseed.shop and https://store.example.com). If you do not configure your primary domain, search engines may penalise you for duplicate content, so simply set the toggle for your primary domain, after the domain has been fully validated. (We’ll remind you of this in the notification we send when your domain becomes active.)
Customising your Smart Store pages
You can customise any of your pages in the left column. The image below shows the default home page. You can re-arrange items, remove items, or even add new items, to build a unique home page design.
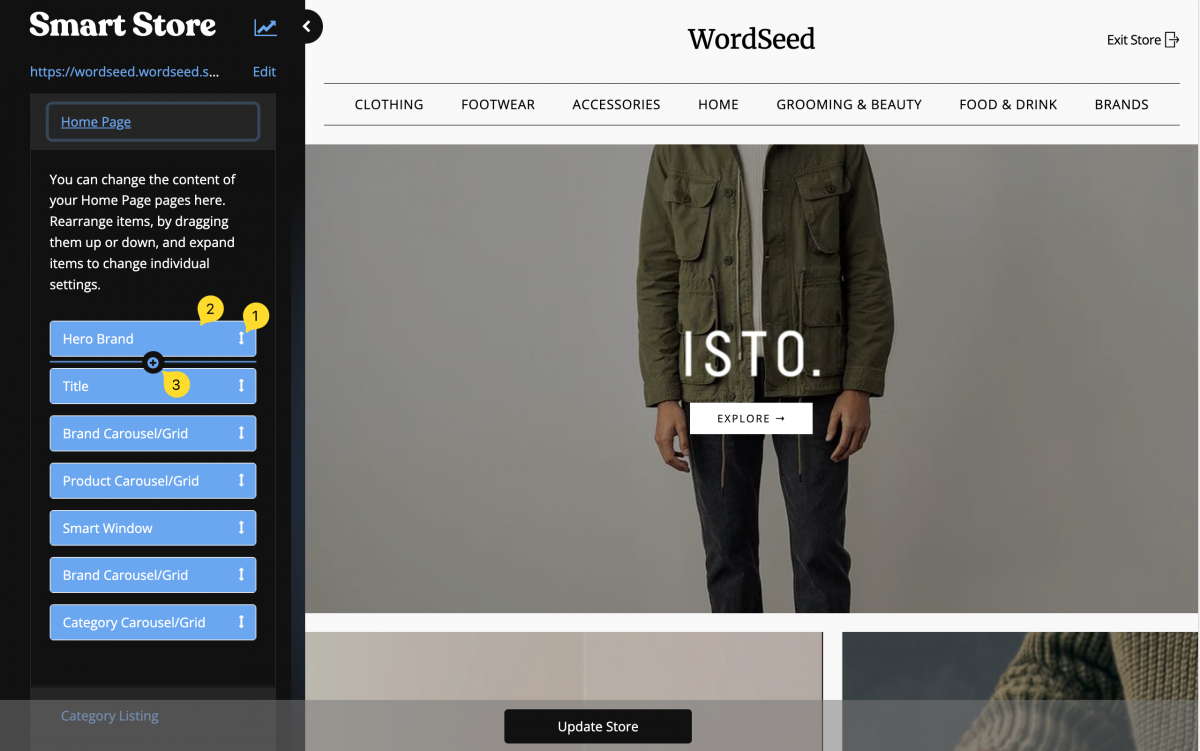
- Drag the arrows to move items up or down.
- Click the item to expand and customise it.
- Click the plus icon that appears when you hover with your mouse, to add additional items.
Below is an example of a how you can customise one of the sections. In this instance, the section you are editing is a Hero Brand section which, by default, sits at the top of your home page.
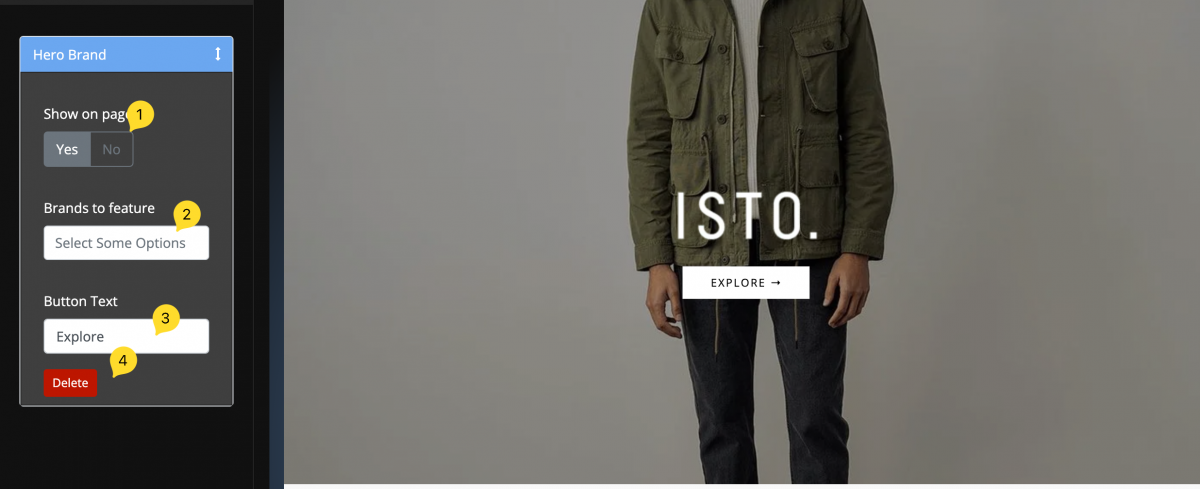
- You can hide a section here, if you don’t want it to show on your page.
- For many sections you can choose which brand(s) and/or category you want to feature. This is not usually needed, and if you don’t, we’ll automatically pick those with high CPC and click through rate to optimise the performance of your Smart Store.
- In this instance you can additionally change the text of the call to action button.
- This is where you can delete a content section.
The specific settings available will depend on the type of content section you are editing.
Some great stores have already been built including this example from On Point Fresh.
Enjoy playing around with the various settings available, and get in touch if you have any questions.